Hiển thị các bài đăng có nhãn body scrub. Hiển thị tất cả bài đăng

7 Great Ways to Lighten Stretch Marks …


What’s preventing you from flaunting your body? Why do you always hide yourself behind full sleeves and long tops? Dying to wear those low-waist jeans to show off your curves? What’s stopping you? Oh, I get it – it must be those horrible, unsightly, stretch marks that make you feel so bad about yourself. What caused it – weight gain? Or, weight loss, perhaps? Or, did you recently have a baby? Congratulations, but we need to do something about those fierce red lines running across your waist. Here are 7 great ways to lighten stretch marks. I can’t promise they will disappear completely but hey, they can become less obvious. And that’s good news, isn’t it?


1. Healing the skin
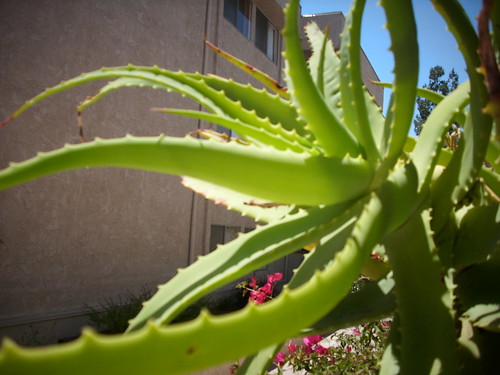
Photo Credit: Jaci.Leigh
The first step to treat stretch marks and lighten them is healing the skin. For this mix ½ a cup each of aloe vera gel and olive oil, a tbsp of vitamin A oil and two tbsp of vitamin E oil. Massage this onto the affected area. This is a proven remedy to heal the skin and make it soft and supple.

2. Exfoliate your Skin with a Body Scrub

Photo Credit: Natural Grace
Exfoliation removes dead skin and doing so is one of the better ways to lighten stretch marks. Make a body scrub by mixing two tbsp of whole milk, a quarter cup sugar (preferably the granulated variety), and two tbsp olive oil. Sugar granules will get rid of the dead skin while olive oil and milk will moisturize it.

3. Olive Oil & Lemon

Photo Credit: simply…gluten-free
Here’s yet another way to use olive oil and lighten stretch marks. Mix together a tsp of olive oil and vitamin E oil. To this add a quarter tsp of lemon juice. Apply this mixture to your skin two times a day till you see your stretch marks fading.

4. Coco Butter & Emu Oil Paste

Photo Credit: Nomadic Lass
Emu oil and cocoa butter are powerful agents when it comes to lightening stretch marks. Mix a tsp of cocoa butter with two tbsp of emu oil and form a thick paste. For better results, use only pure emu oil. Rub this paste onto your skin and massage it for a couple of minutes. Allow the pack to sit on the skin, if possible overnight, or for a period of four hours.

5. Massage with Natural Oils
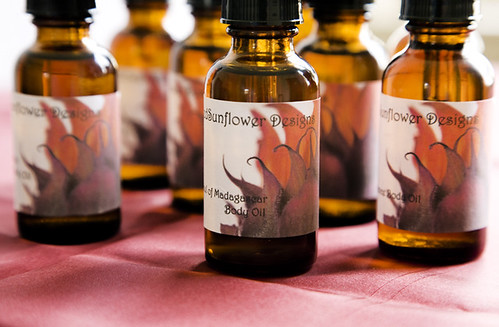
Photo Credit: RedSunflower25
Fall back on natural oils and you shall have one of the best ways to lighten stretch marks. Some natural oils have properties that helps fade stretch marks and make the skin soft and supple. In addition, they also prevent further damage to the skin. Choose an ounce of one of these three oils – jojoba, sweet almond, or avocado. To this add seven drops of lavender oil and a few drops of chamomile oil. Apply this mixture every day and massage it onto the stretch marks gently.

6. Make a Coffee Rub
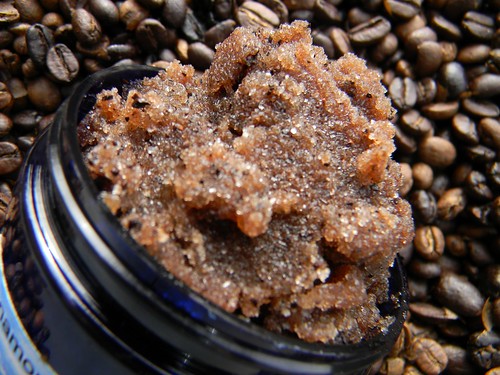
Photo Credit: Hiatus Bath
Not many people know this, but coffee makes for an excellent body scrub. Grind coffee beans but not to too fine a consistency. They must be slightly coarse in texture. Mix this with water and rub it on to the affected area. Move your hand in gentle circular motion for about a minute and wipe off the coffee mixture with a warm, damp cloth.

7. Laser Surgery

Image source: larrymulvehill.com
As they say, desperate times call for desperate measures. If you have a particularly bad case of stretch marks, you may require medical intervention. They are slightly on the expensive side, but many have declared themselves satisfied with the effects of laser technology. Speak to a professional about the pros and cons of laser surgery and the costs involved in this procedure.
There you go – 7 ways to lighten stretch marks; 7 tips to restore your confidence; and 7 ideas to liberate you from claustrophobic body-covering clothes. I can already smell the fragrance of independence, of noodle straps and miniskirts. Say, what clothes are you going to chuck out of your wardrobe?

Read More

8 Steps to an Amazing Home Spa Day …


While the economic crisis has meant we need to cut back on a lot of things, TLC shouldn’t have to be one of them. Your budget may not stretch to accommodate hours at the salon, but that’s no reason to forfeit pampering all together. I’ve recently been introduced to the concept of a home spa day and I’ve got to say, I’m pretty sold. With a little ingenuity and a bit of creative thinking, it’s possible to recreate some of the luxurious salon experience on your own, at a fraction of the cost and without leaving your house. I’ve done a little research and put together a list of 8 steps to an amazing home spa day.


1. Clear Your Schedule

Photo Credit: cepis.org
A true spa day is about ‘me time’, and one that takes place in your home is no different. Get a little selfish: pick a day where you have no other pressing engagements so you can spend the time focussed on entirely on yourself.

2. Begin with a Body Scrub and Hot Shower

Photo Credit: company.co.uk
If you’re keen to have a full-on, full-length day of pampering, salon professionals suggest you should start with a shower and a total exfoliation. Use a good-quality store-bought scrub all over your body, or alternatively, make your own from yellow sugar, olive oil and blended fruit (use either mango or berry – they smell delicious). Don’t wash your hair or face at this point: this initial shower is simply a way to prepare your skin for the treatments to come.

3. Moisturise


Before you begin your home spa day, scoop a little of your favourite lotion out of its tub and into a microwavable plastic container. Microwave it for (literally) a few seconds until it’s just starting to get warm and then apply. The cream will sink straight into your exfoliated skin and the sensation is super-luxurious.


4. Hair Mask

Photo Credit: bridgat.com
Once you’re out of the shower, dry off and apply a nourishing mask to your damp tresses. When you feel that the every strand is well-coated pull your hair away from your face and wrap it all up in towel, turban-style. Leave the product in while you’re busy with the rest of your treatments; this way it’ll really have time to get to work on those tired-out locks. When you’ve finished with your spa day, rinse your hair with a hand-held shower, and shampoo and condition as normal.

5. Face Pack

Photo Credit: spar.co.uk
While your pores are still open from your hot shower, get to work applying whichever face pack you feel most appropriate. In preparation for your spa day, you might want to browse the shelves at your local pharmacy in search of the perfect product your skin, or, alternatively, make your own mask at home from the ingredients you have in your kitchen. Good staples include avocado, banana, oatmeal and egg whites.

6. Pedicure

Photo Credit: healthwikionline.com
While you’re facemask is working on your skin, you can get going with a home pedicure. Soak your feet in a basin of warm water for fifteen minutes or so. Once your skin is soft, apply a foot scrub to buff away dryness and impurities. Towel dry thoroughly, and then smooth out calloused areas with a pumice stone. Massage an appropriate lotion all over your feet and calves, trim nails in a straight line to avoid ingrowth and then paint with polish in your favourite colour.


7. Cleanse and Apply Cream

Photo Credit: antiaging4life.com
Once you’re facemask has been on for the appropriate length of time, gently massage it off over the bathroom basin using luke-warm water. You may want to apply a cleanser to your skin, but more than likely, this won’t be necessary. Pat your face dry with a soft towel, tone and then apply a facial moisturiser in light, circular motions to stimulate circulation.

8. Manicure


Your manicure should come towards the end of your spa-day because you’ll need to allow plenty of time for your nail polish to dry. To start with, take off the nail polish you’re wearing, and get to work trimming and filing nails into the desired shape. Once this is done, soak your hands in a basin of warm water for about 15 minutes; add a dash of lemon juice as a natural stain bleach. Then, with your body scrub, exfoliate hands thoroughly, working in gentle but firm circular motions and rinsing when complete. Apply cuticle oil, get to work with the orangewood stick, rinse and dry once more and finally, paint on polish in your favourite colour.
So there we have it: 8 steps to an amazing home spa day. Spending a few hours alone with your thoughts and your body products is a great way to unwind, but if you’re keen to enliven your spa experience, invite a few friends over for a group pampering session. Either way, you’re bound to feel refreshed and rejuvenated after a day of intensive treatments. Do you have any suggestions of your own to add?

Read More
Related Posts Plugin for WordPress, Blogger...

More